


Whew. What. A. Week. Personally, I’m so over hearing anything related to Corona unless it’s the sound of the cap coming off one straight out of the fridge, amiright?
I mentioned on Instagram the other day that my heart is aching for Brey Photo families, engaged couples, and brides and grooms, that have had to move their events due to COVID-19 lockdowns. So much time, investment, and excitement just to have it all crashing down at the very last minute. Even though it’s a huge bummer, I am SO happy to announce that we have new dates tacked up on my calendar for EVERY SINGLE ONE! All of those families will be able to get those gorgeous images at a later date when it is safe for us to do so.
While I’m super excited about that, I’m also sad because I know that not everyone gets a new date. My motherhood clients are being robbed of this experience. And I’m crushed for them.

I cannot imagine the stress that isolation must be causing to new or expecting moms—to have birth plans sacrificed, to not be able to have midwives and support persons present, worrying about the safety of their newborn, etc., and now, so many mamas cannot even have their maternity, birth, or newborn photos, photos they should have to hold onto for the rest of their lives. It’s a swift kick in the shins, that’s for sure.
I cannot let all you mamas go through this time undocumented. So, I am laying out the most basic of things I know to help you get those beautiful baby shots, even if you don’t have a “real” camera or know how to use one.
For simplicity’s sake, I will be focusing on traditional indoor newborn portraits that follow my unposed, organic style, but all of these tips can be applied to a hospital setting as well, if I am unable to capture your Fresh 48 session.
Before you go on, I want you to really promise yourself that you will do this. Take those images, even if you aren’t happy with the results at first. Take photos of Mama, too. If not for you, then for baby.
Say it with me: “I will not settle for a poorly lit iPhone photo.”
Now this: “I pledge to put mama in the frame with intention.”
And this: “I will not let fear, anxiety, or disappointment keep me from documenting my transcendence into motherhood.”
Okay, enough of that— there’s a reason I’m a photographer and not an inspirational speaker, but you get my point. We’re doing this.

Here’s where I need you to start:
Keep safety and comfort a priority.
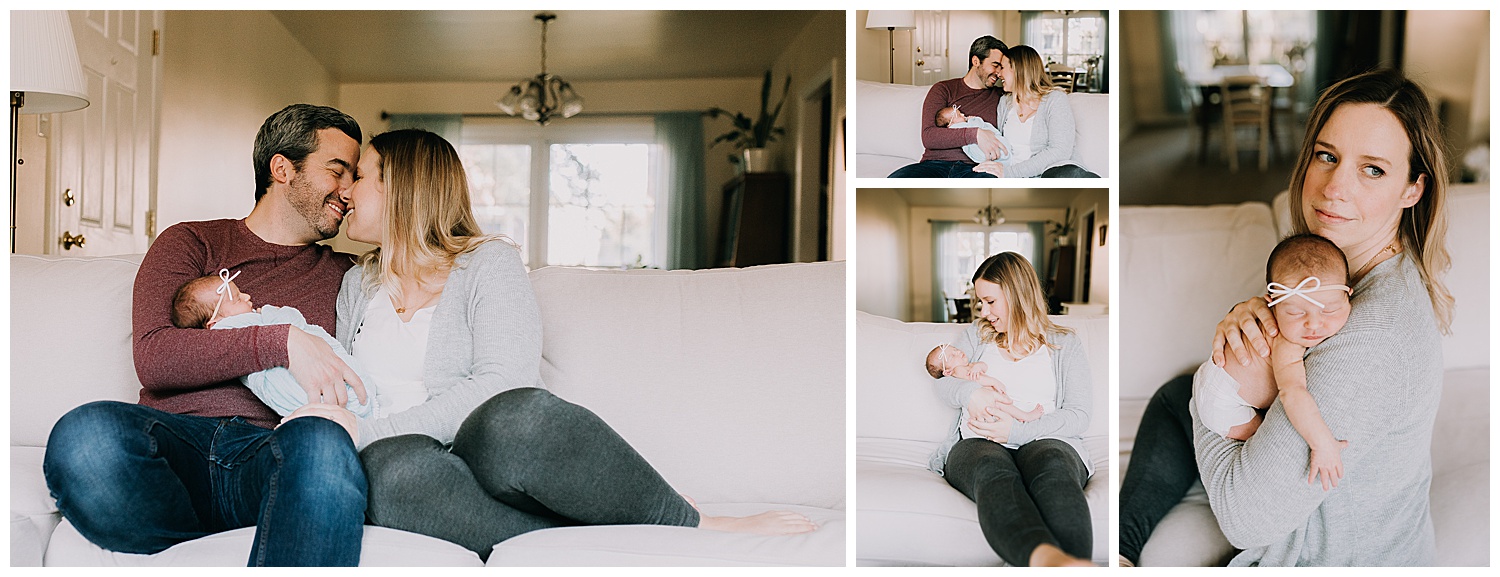
If you’ve had a #breyphotobaby before, then you know that I focus intentionally on lifestyle and genuine interaction. There’s two main reasons for this: 1) I thrive on that raw, snuggly connection and 2) I come directly to my clients— I’m not outfitted like a studio photographer, and you definitely aren’t either.
Recovering mothers and newborns can easily be hurt if you are not properly posing them, so keep your expectations realistic and simple. Avoid anything like “froggy pose,” anything involving buckets or Easter baskets (I know, tempting this time of year but be strong). There should be no hanging a baby in a hammock, putting baby on his or her stomach with their head propped, etc. Those Pinterest images are mostly all Photoshop magic created by experienced, outfitted, highly educated photographers that specialize in their art. Let me repeat that for you in bold so you can’t skim it: advanced poses, if not done by a professional, are unsafe. Do not attempt them.

Okay! Now that we’ve got safety squared away, let’s move on.
Use what you have.
Myth: In order to take good photographs, you need an expensive camera.
The best camera is the one you have. Your phone camera will compensate for lighting and with a few tricky tricks, you can produce a decent image that will print OK, though I don’t recommend blowing an iPhone image up too large with the same expectations you would have of a professional print from the BP Gallery Shop.
If you are using a smartphone— make sure that it is charged and has plenty of free storage. I recommend downloading the Adobe Lightroom Mobile App to make color corrections afterwards. (I’ll be doing a tutorial on how to use Lightroom to edit your images next week!)
If you have a DSLR camera or point and shoot, great! If you understand anything about how your camera works, use what you know and experiment.
For in-home sessions, I usually shoot around f/1.8-f/2.8, using a 35mm lens for pulled back shots, and my dreaaamyyy 85mm lens for just about everything else. Again, whatever lens you have is the best lens. Head on over to the Brey Photo VIP Facebook group to join me for my next virtual coffee date where you can ask me all your camera related questions if you’d like to learn more about how your specific camera can work for you.

Prep ahead of time.
The last thing any new mama wants to do is get all situated only to have to get up and grab something. During a newborn shoot I always have on hand:
- Hand sanitizer
- Several plain colored swaddle blankets
- A water proof pad for accidental messes (puppy pads or lots of paper towels will work too)
- Several thick blankets of different weights and textures
- A bean bag or posing bean (a small pillow or a rolled towel will work in place of this)
- A space heater, if needed


Keep baby fed, warm, dry, and quiet during the time leading up to your photoshoot.
Full, warm babies are happy babies.
I am a no force photographer. All of my sessions are child-led. Babies do fuss, but if a baby is fussing for me, I can usually assume one of these things:
- Baby is chilly. The room you plan to shoot in should be warm, well above 68 degrees— but not over 80. I always ask parents to turn the heat up several hours before our session. If you’ve turned your heat off for the season, use a space heater to warm up your space.
- We have a wet diaper – Make sure baby is dry before you start.
- Baby is hungry. Make sure baby is fed well immediately before you start. Having a bottle on hand to “top off” baby if you aren’t nursing can be super helpful so you don’t have to fumble about making one during your shoot.
- Baby is over stimulated. Rattles, flashy toys, duck noises.. sometimes, it’s all a bit too much. Stream a white noise playlist from Spotify and use gentle but reassuring “shhhhhush”ing and soft pats on the bum
to reassure baby that they are safe.

Choose the area of your space that has the best light. Keep it simple.
Create the best light.
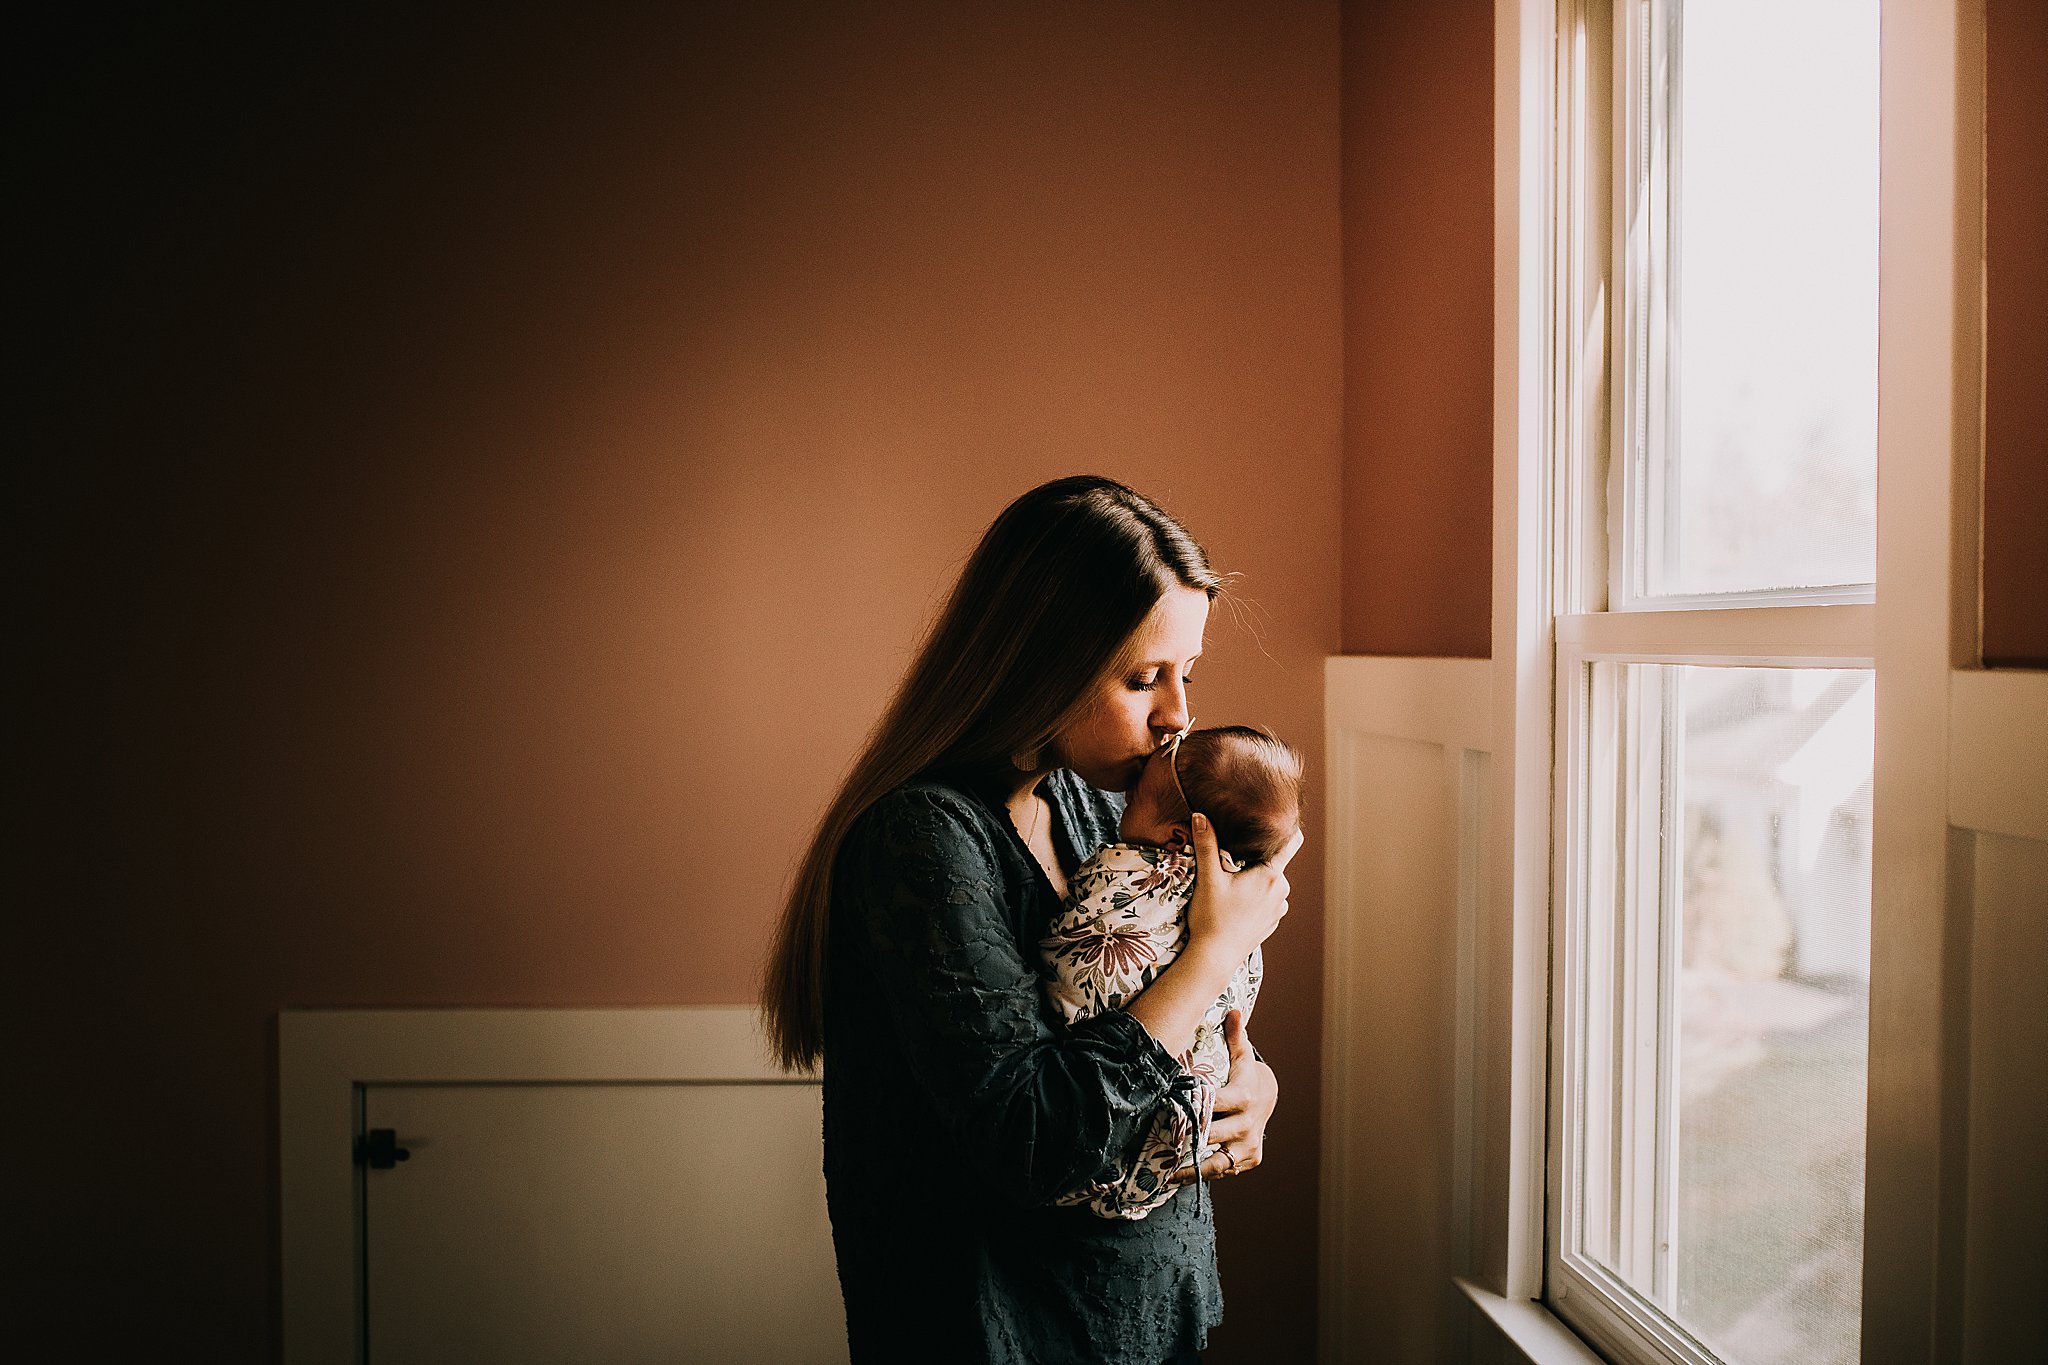
Soft, indirect light is the best for cheeky newborns. Newborns may have dry, flaky skin, and may have some swelling from their trip through the birth canal. I typically don’t do a lot of skin retouching because I want my clients to be able to remember their babies exactly how they were— these are babies, not models on a magazine. Wide, diffused window light will smooth imperfections to keep skin looking natural and distract from blemishes. Soft, even and even temperature lighting will make shooting easier for you, especially if you only have a phone to work with and cannot control your camera settings.
Choose the time of your shoot and the space in your home based on window lighting and turn off all the lamps to keep your coloring and tones even. All my newborn sessions are scheduled around 11am, because this is typically the time of day when most of my client’s homes are brightest and most evenly lit in our area, regardless of weather or season.
If there’s too much light…Hang a white bed sheet (Walmart, $5) over the window to diffuse the light. You can also play around with the exposure compensation if you’re using an iPhone (it’s the little sun on your focus square).
If there’s not enough light… Resist the urge to use the flash. Make sure you’re actually using the best spot in the house based on lighting, not decorations, and that you’re shooting at the right time on a sunny, well lit day. A piece of white poster board makes a great makeshift reflector, too. Point it at your light source to bounce light back onto baby, specifically under the eyes and nose.

Shoot down and follow the light.
9/10 times I shoot babies upside down. Er… okay no, we will not be doing cartwheels to take these photos. BUT, do stand at baby’s head or to the side and shoot down the bridge of the nose. This keeps the face proportionate and soft, and prevents photos up the nostrils, which are unflattering.
Positioning baby so that the light falls down the face evenly will help you with achieving those soft, snuggly looking images.

“Must Have” Shots
It’s been three years to the week that I since I shot my very first “official” newborn, and over the years I’ve curated a shot list that includes all the must haves. I run through this list, now engrained in my head, to try to capture as much of it as I can on every session.
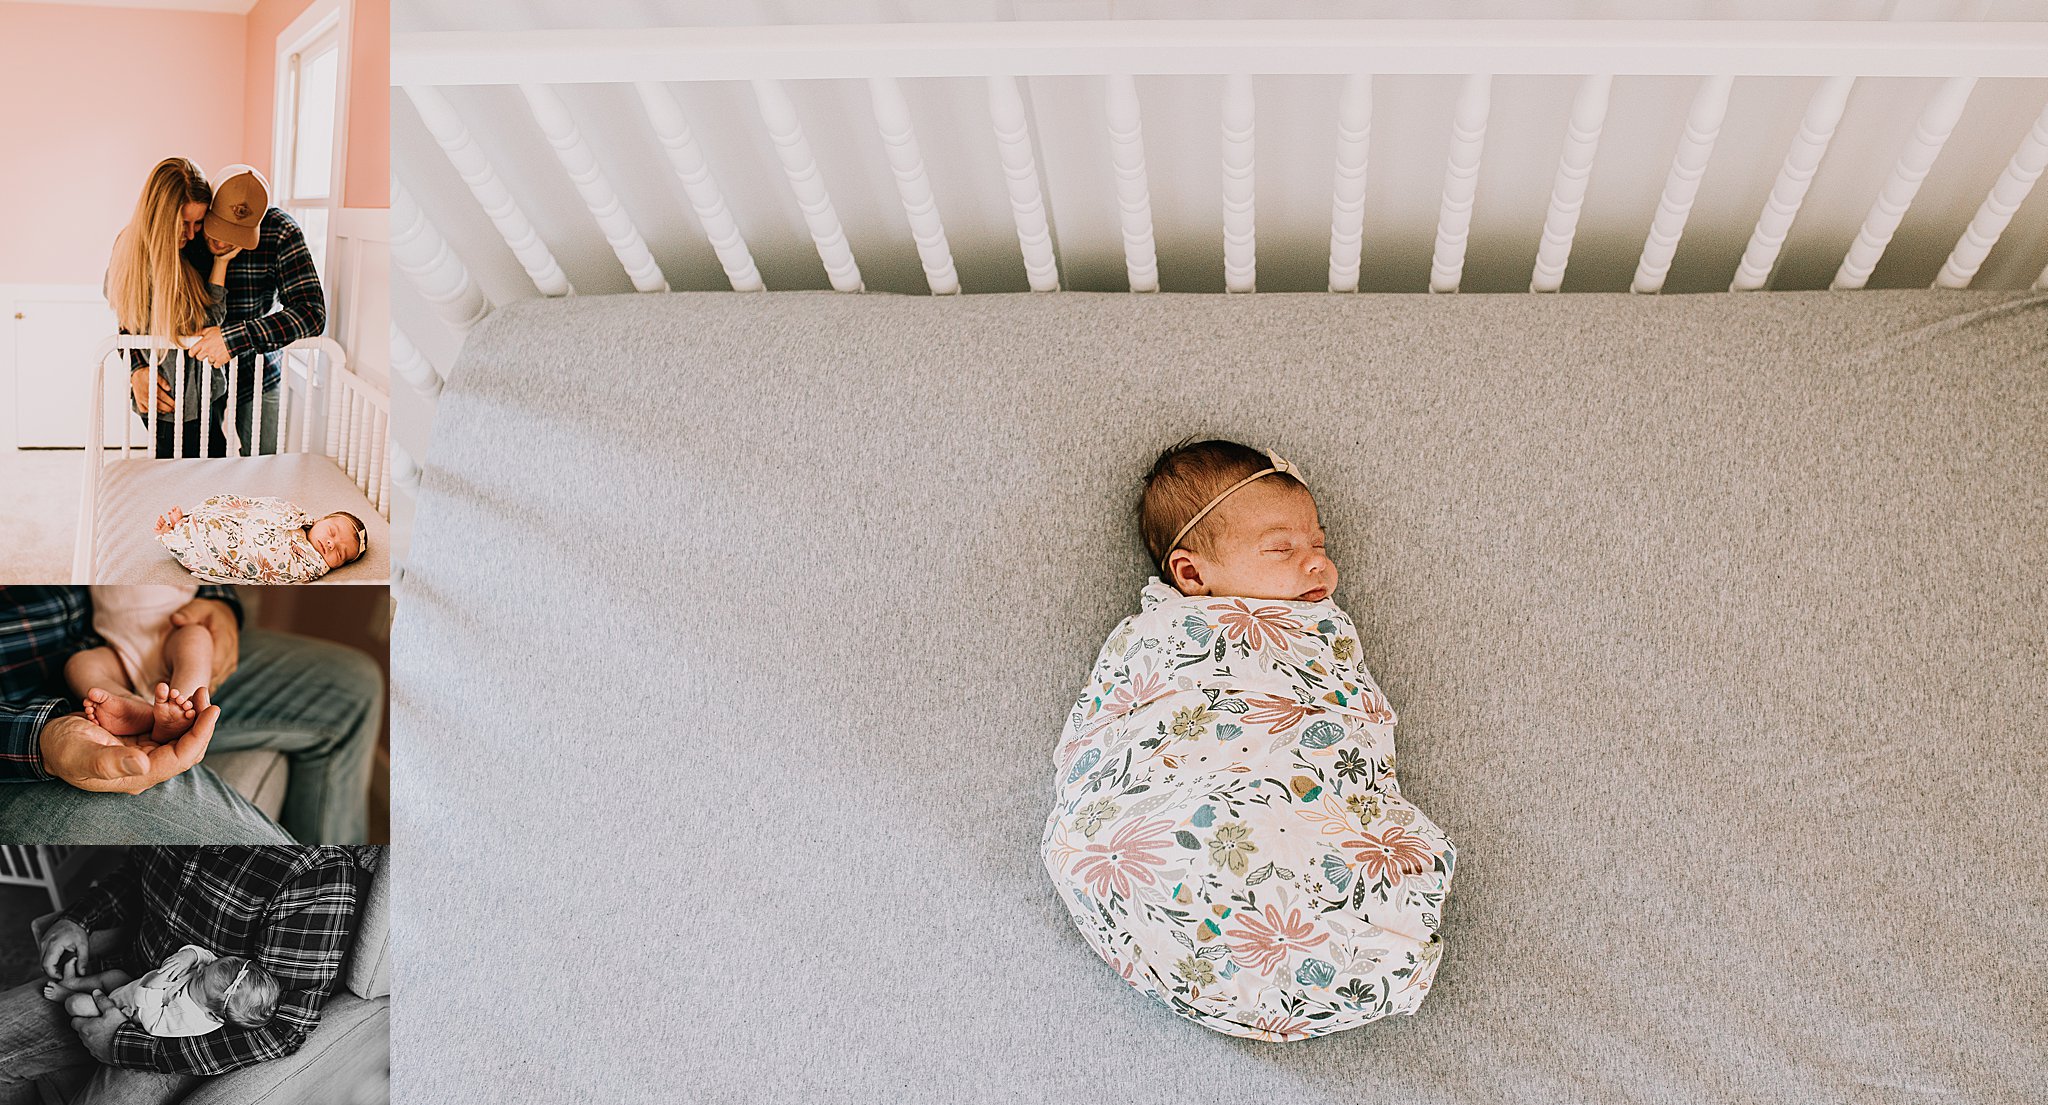
- Document baby’s space. Even if baby doesn’t have a nursery, document her space to help set the tone and get used to using your camera in a creative way.
- Crib, sleeping areas
- Play area
- Mobiles
- Books
- Blankies and luvvies
- Ultrasound photos
- Baby swaddled in her crib
- Full body
- Face
- Profile
- In between the bars of the crib, if you have one
- From over top the mobile, if you have one
- Baby swaddled on your bed or a blanket
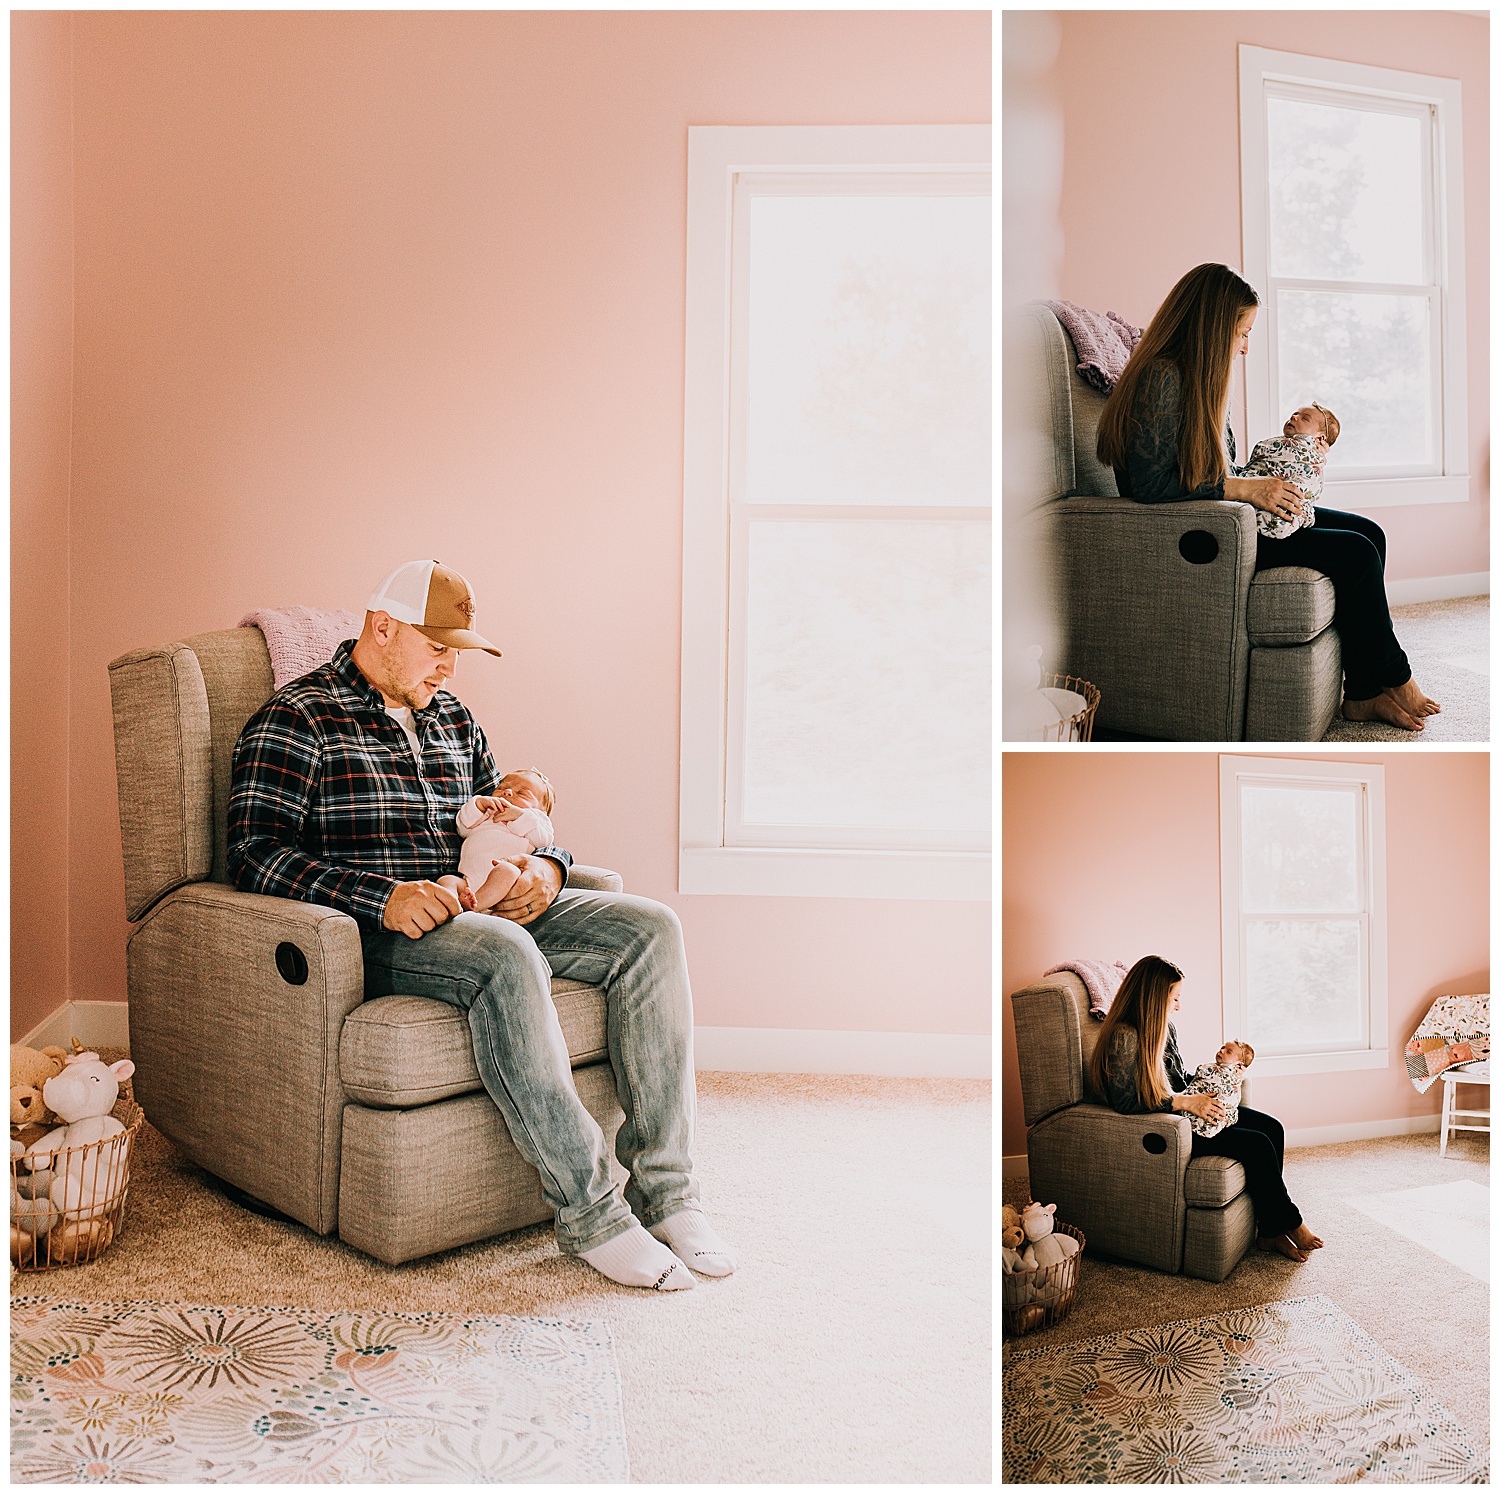
- Mom, Dad, and/or siblings on the floor in front of the crib with baby
- Shoot close
- Shoot from as far back as possible
- Shoot from above or over the shoulder
- Shoot from baby’s level to capture hands/feet in comparison to parents’
- Mom, Dad, and/or siblings holding baby, shot from the doorway or from behind a curtain
- Profile of mom holding a baby, usually in front of a window is best
- Above mom, with her arm cupped around baby while on a bed or blanket
- Sibling(s) with baby
- Dad with baby, profile and from above

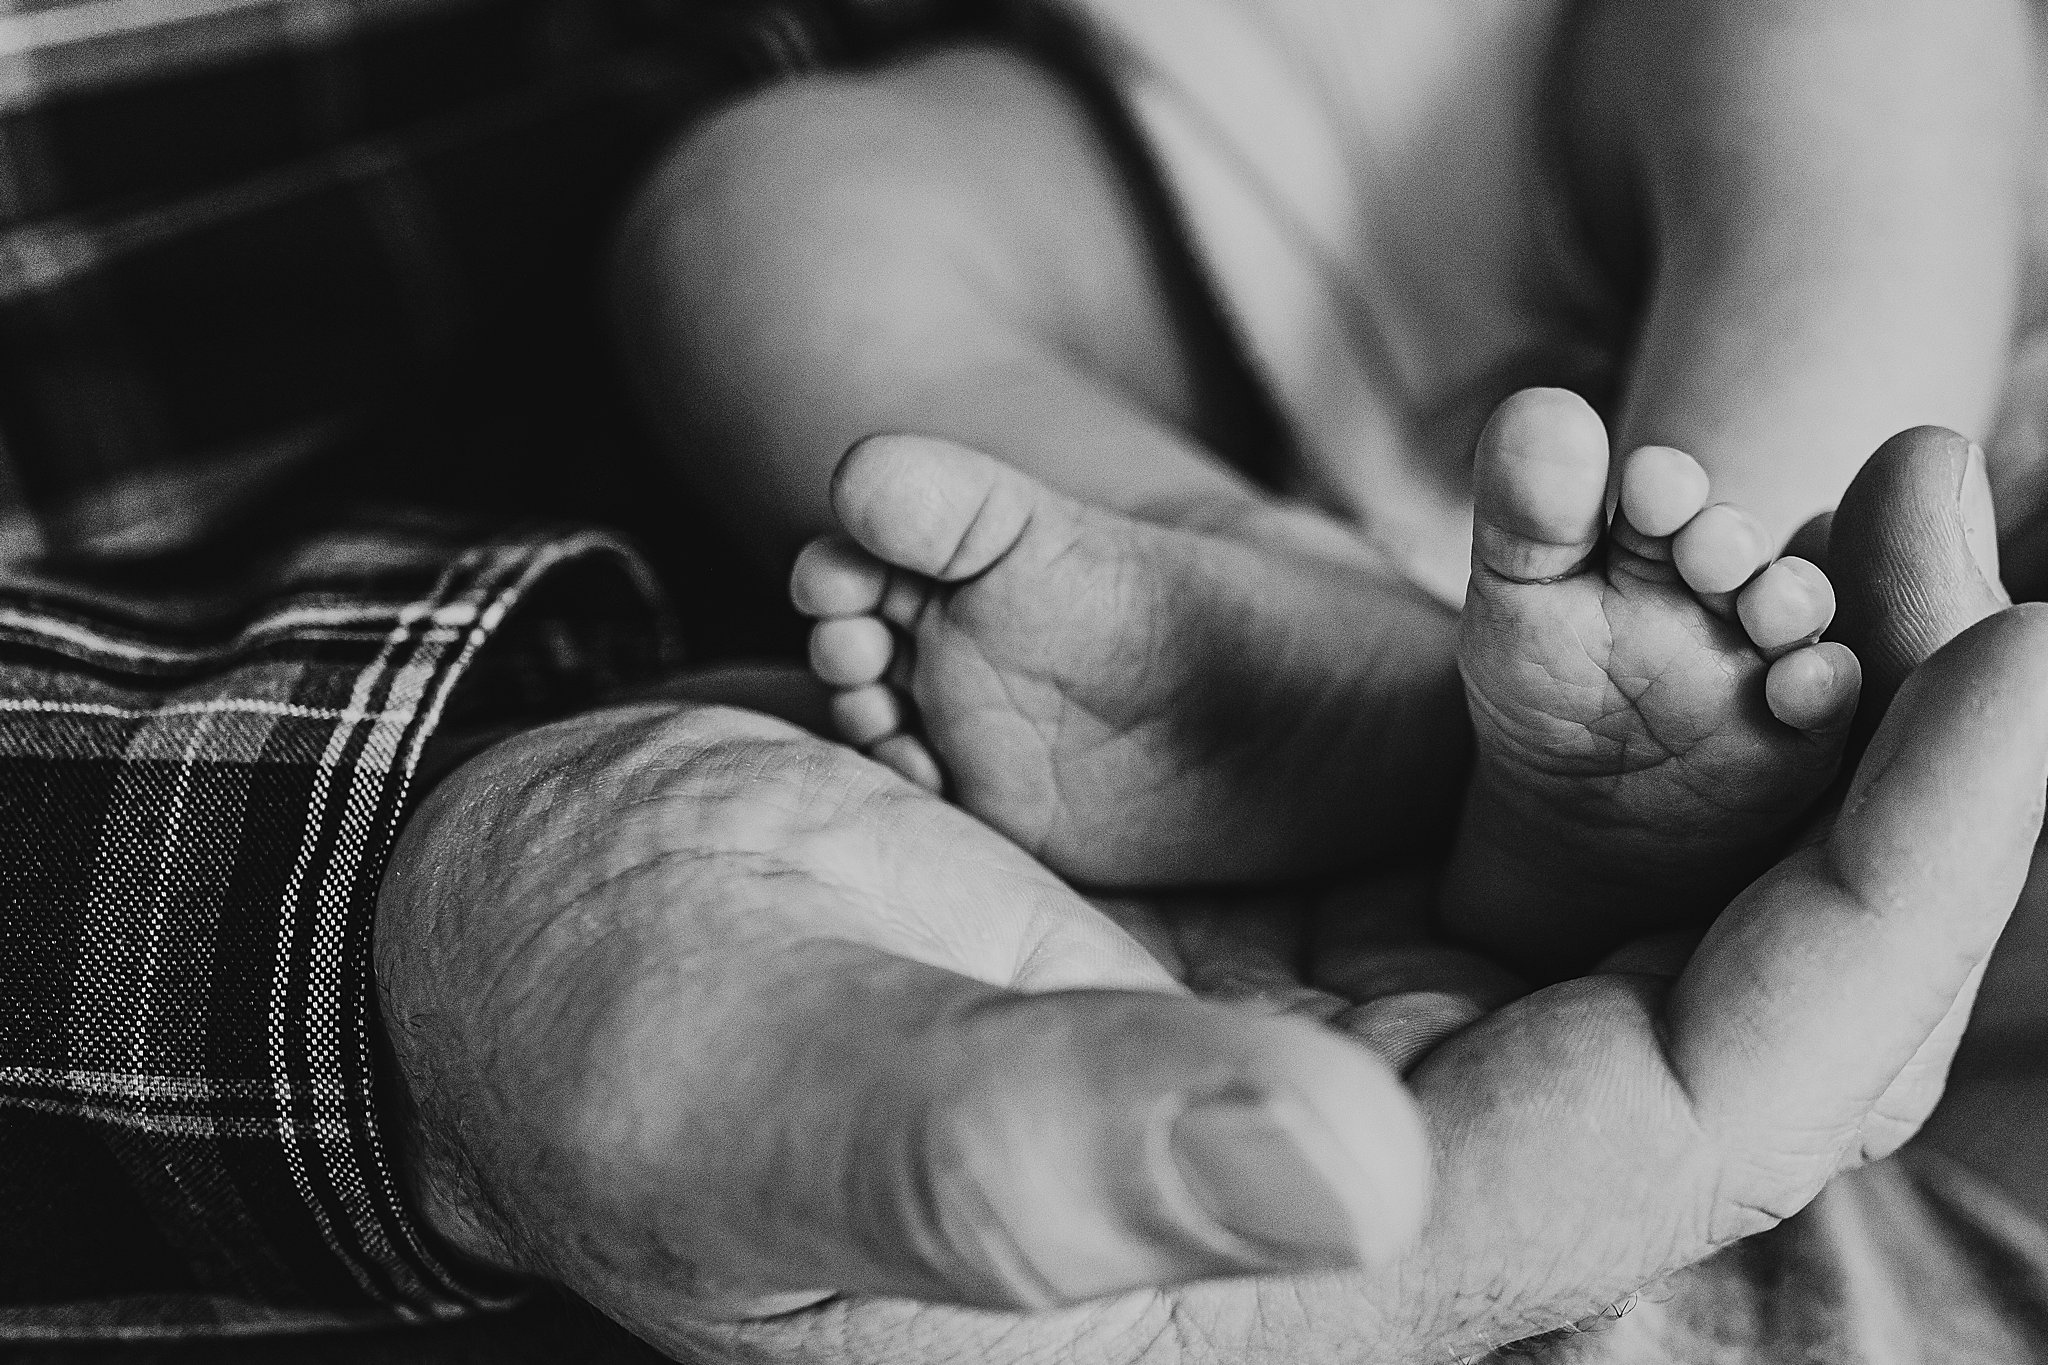
For itty bitty details
Fingers and toes are some of my favorite baby photos, but they can be tricky to snap when baby is so squirmy. Luckily, iPhones are equipped with focus locking— tap the screen to focus and hold down until you see “AE/AF Lock” appear.
Toes and fingers will never be as small as they are now, so get snapping. Here’s a list of the top details I try to capture on any newborn:
-
- Hands
- Feet
- Toenails
- Fingernails
- Hair and/or cowlicks
- Eyelashes
- Eyebrows
- Birthmarks/strawberries
- Ears
- Cord or bellybutton


For awesome self portraits
Download a self timer app, like PhotoTimer+ or TimerCam if you’re using a smartphone, or a camera remote app if using a camera. Some Canon, Sony, and Nikon cameras are equipped with Wifi/Bluetooth so you can connect them to your phone. If your device has a burst mode or multiple trigger function, use it!

Parenthood is an amazing, amazing experience and you owe it to yourself to document the start of your journey. You owe it to your baby, too. Hopefully this was helpful and maybe a little bit of a kick in the booty to get in that frame! I want to see what you create! Feel free to post your creations on the Brey Photo Facebook page , tag @breyphoto or just use the #breyphotobabies tag to show off what you make! Keeping you all in my thoughts and anxiously waiting to get you in front of my lens soon.


LEAVE A COMMENT
Comments